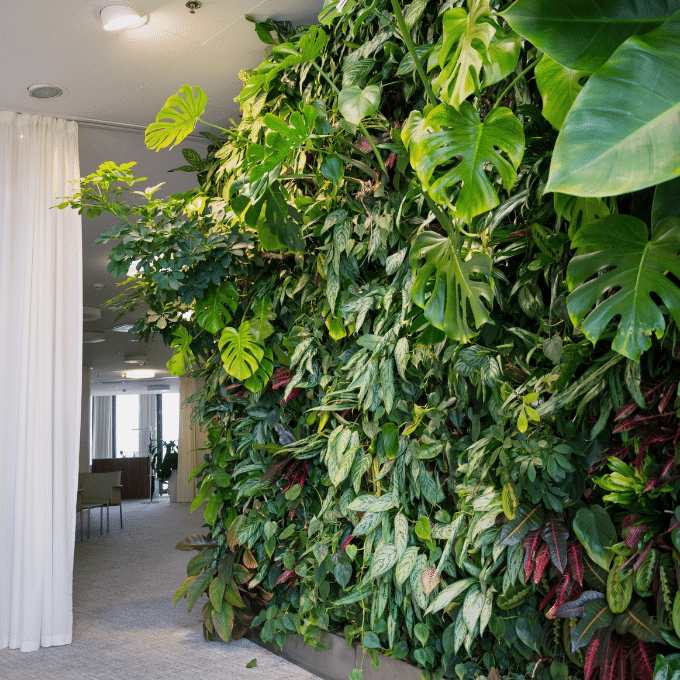
Living walls—a transformative way to bring the outdoors inside and elevate your living or office space. In this comprehensive guide, we’ll explore the benefits of creating a plant wall, the step-by-step process to build one!
Why Build a Living Plant Wall?
Before we dive into building a plant wall, let’s talk about why it’s more than just a decorative trend. Living walls offer so many natural healing benefits, including:
- Improved Air Quality:
- Living walls act as natural air purifiers, absorbing pollutants and releasing fresh oxygen, creating a healthier indoor environment.
- Enhanced Aesthetics:
- Anxiety anyone? A living plant wall adds a touch of nature’s beauty to your space, creating a visually stunning and calming atmosphere.
- Space Optimization:
- Perfect for small spaces, living walls allow you to maximize your vertical space, turning unused walls into a natural greenspace.
- Stress Reduction:
- Studies show that exposure to nature, even indoors, can reduce stress levels. A living plant wall brings nature inside, promoting a sense of tranquility.
Ready to build your plant wall?!
Step 1: Choose the Right Wall and Location
Selecting the right wall is crucial for the success of your living wall. Consider factors such as available sunlight, ease of access for watering, and the overall aesthetic of the space. Living walls can thrive in various locations, including living rooms, bedrooms, or even office spaces with ample natural light.
Step 2: Gather Your Materials and Tools
To build a living wall, you’ll need:
- Vertical planters or wall-mounted containers: These come in various designs, allowing you to choose the style that complements your space. Options include trellis style or wall slats to hang small pots, planters that attach directly to the wall, hanging pockets, or for the renters a tall free standing plant stand with built in grow lights.
- Plants: Opt for a mix of trailing, cascading, and compact plants. Some excellent choices include pothos, ferns, succulents, and spider plants.
- Potting mix: Use a well-draining mix suitable for your chosen plants.
- Drill and screws: To mount the containers securely on the wall.
- Watering can or irrigation system: Depending on the size of your living wall, choose a watering method that suits your needs.
Step 3: Plan Your Plant Layout
Consider the growth habits and light requirements of your chosen plants when planning the layout. Arrange them in a way that allows each plant to receive adequate light and space to thrive. This step is like creating a living work of art, so don’t be afraid to experiment with different arrangements.
Step 4: Mount the Containers
Securely mount your chosen containers or vertical planters on the wall. Ensure they are level and firmly attached, as the weight of the soil and plants can add up. If you’re renting or prefer a non-permanent solution, there are also freestanding living wall systems available.
Step 5: Planting Your Wall
Now comes the exciting part—planting your living wall! Follow these general guidelines:
- Start with the largest plants first: Place them at the bottom or in the center, depending on your wall’s design.
- Fill in with medium-sized plants: Add variety in height and texture to create visual interest.
- Finish with trailing or cascading plants: Let them spill over the edges for a lush and dynamic effect.
Step 6: Watering Schedule and Maintenance
Proper watering is crucial for a thriving living wall. The frequency will depend on factors like plant types, wall location, and indoor conditions. Here’s a general guide:
- Check soil moisture regularly: Use your fingers to assess if the top inch of soil is dry before watering.
- Water thoroughly: Ensure water reaches all the plants evenly but be mindful of overwatering with the potential to create water damage to your wall. See below for more water damage mitigation tips.
- Adjust according to seasons: Plants may need more water during warmer months and less during winter when indoor heating can dry the air.
Lighting Solutions for Low Light Areas
If your chosen wall has limited access to natural light, consider these lighting solutions:
- LED Grow Lights:
- Placement: Install LED grow lights above the living wall to provide supplemental light. Consider placing a lightweight mounted curtain rod above the plants, attaching the grow lights to the curtain rod.
- Timing: Set the lights on a timer to mimic natural daylight hours.
- Recommendation: Opt for full-spectrum LED lights for optimal plant growth.
2. Low-Light Tolerant Plants:
- Pothos: A resilient trailing plant that thrives in low light.
- Snake Plant: Known for its adaptability to low light conditions.
- ZZ Plant: A hardy option that can tolerate low light.
Important Note: Mitigating Water and Mold Risks in Your Living Wall
It’s crucial to be aware of potential risks associated with moisture while planning and assembling your living plant wall. Overwatering or inadequate moisture management can lead to unwanted consequences, such as water damage to your walls or the growth of mold. Let’s explore some proactive steps to ensure your living wall remains a source of joy without becoming a source of problems.
1. Monitoring Moisture Levels:
Excessive moisture can wreak havoc on your walls, causing issues like water damage and mold growth. To prevent this, adopt the following practices:
- Regularly Check Soil Moisture: Use your fingers to gauge the moisture level in the soil. If the top inch feels dry, it’s time to water.
- Invest in Moisture Sensors: Consider using moisture sensors in the soil or behind the living wall to provide real-time data on moisture levels. This can be especially helpful if you’re concerned about overwatering.
2. Watering Wisely:
Proper watering is a delicate balance, and it’s crucial to avoid both underwatering and overwatering. Here’s what you can do:
- Establish a Watering Schedule: Develop a consistent watering schedule based on the needs of your specific plants. Different plant types may have varying water requirements.
- Adjust for Seasonal Changes: Be mindful of seasonal variations. Plants often need more water during warmer months and less during the winter when indoor heating can contribute to drier air.
3. Use Well-Draining Soil:
Choosing the right potting mix is key to preventing waterlogged soil, which can lead to water damage. Consider the following:
- Well-Draining Soil Mix: Select a high-quality potting mix designed for container gardening that promotes proper drainage. This helps prevent water from accumulating at the base of the living wall.
4. Protecting Your Walls:
To safeguard your walls against potential water damage, mold, or staining, take the following precautions:
- Water Catchment System: Place a waterproof lining behind your living wall to catch any excess water that may seep through the soil. This prevents water from reaching the wall surface.
- Use Wall Protectors: Consider adding a waterproof protective barrier or sealant to your walls, especially if they are susceptible to water damage. This extra layer of defense can shield your walls from any potential moisture-related issues.
5. Addressing Mold Concerns:
Mold can thrive in damp environments, posing a risk to both your plant wall and indoor air quality. Take these steps to minimize the likelihood of mold growth:
- Ventilation: Ensure proper air circulation around the living wall. This can be achieved through the use of fans or by strategically placing the wall in an area with good air movement.
- Maintain Optimal Humidity: Keep indoor humidity levels in check, as high humidity can contribute to mold growth. Aim for humidity levels between 30% and 60%.
By taking these proactive measures, you can enjoy the benefits of a living plant wall without the worry of potential water or mold damage.
Final Thoughts: Your Living Wall Journey
As you step back and admire your living wall, you’ll realize that you’ve not only created a stunning focal point but also a dynamic ecosystem within your home. Your living wall is a living, breathing piece of art that contributes to the well-being of both you and your indoor oasis. Happy planting!
